
scottpatterson1971
Single Track Dirt Bike Trails: Skills You Need First
Single track dirt bike trails have a way of exposing every gap in your riding. The trail is narrow, the trees are close, and there is no room to drift wide when a line goes bad. Riders who handle it well are not doing anything magical. They have simply built a set of skills on easier ground before pointing their front wheel into the trees.
If you have been riding wide fire roads, two-track, or open desert and you are ready for something tighter, this guide walks through the skills worth developing first. None of them require a race bike or a private track. Most can be practiced in a field, on a wide trail, or in a small practice area before you commit to a full day of singletrack.
What Makes Single Track Different From Other Trails
Trail systems are usually described by width, and the mapping world splits them into a few categories: single-track, 50-inch or full-width roads, and purpose-built moto tracks. Single track is the narrowest of those. It is typically one bike wide, which means passing is difficult, lines are limited, and a mistake puts you into brush instead of open shoulder.
That narrowness changes everything about how you ride. You cannot carry the same speed you would on a road, and you cannot fix a bad entry by running wide. Every input has to be earlier and smoother. The good news is that single track tends to reward patience and precision more than raw horsepower, which gives a prepared beginner a real chance.
Clutch and Throttle Control Come First
Before anything else, get comfortable with the friction zone. On tight trail, you will spend a lot of time slipping the clutch at low speed while the throttle stays nearly closed. Riders who only know how to dump the clutch and go fast struggle immediately, because single track constantly asks for small, deliberate amounts of power.
Practice this in an open area:
- Ride as slowly as you can in a straight line using clutch slip and light throttle, feet on the pegs.
- Start from a stop on a slight uphill without stalling and without spinning the rear wheel.
- Do figure eights at walking pace, using the clutch to smooth out each turn.
- Practice rolling on the throttle in tiny increments instead of on or off.
When you can creep along at a crawl without dabbing a foot, you have the foundation that makes tight trees feel manageable instead of frantic.
Standing Position and Body English
Seated riding works fine on smooth roads. Single track punishes it. Standing puts your legs into the suspension, lets the bike move underneath you, and gives you the leverage to unweight the front wheel over roots and rocks.
Build the habit of standing with a slight bend in the knees and hips, elbows up and out, head over the bars. Grip the bike with your knees so your arms stay loose. Then practice moving your weight. Forward for a front-end bite in a turn or a climb, back for a descent or to unweight the front over an obstacle. Riders who stay locked in one position get tossed around by every bump.
Look Ahead and Pick a Line Early
The single biggest jump in trail speed for most riders comes from where they look. If you stare at the rock in front of your fender, you will hit it. If you look three or four bike lengths ahead, your hands start making corrections before you consciously think about them.
Line choice is a related skill. On single track there is often a main groove plus a small alternative: a rut, a rock, a root-free strip along the edge. Learn to read the trail ahead and commit early. Late decisions force you to brake mid-corner, which is when the front end washes out. On your next ride, try calling the line out loud in your head before you reach it.

Slow-Speed Balance and Tight Turns
Single track is full of switchbacks, tree gates, and awkward corners that kill momentum. Being able to turn sharply at low speed keeps you from stalling out in the middle of a technical section.
Practice turning while standing, weighting the outside peg, and letting the bike lean while your body stays more upright. Add in a few tight circles and some deliberate full-lock turns around a marker. It feels silly in a practice field, but on trail it translates directly into fewer dabs and fewer tip-overs.
Braking on Loose Ground
Most trail crashes start with braking. Grab a handful of front brake on loose dirt or gravel and the front end tucks. Lock the rear and the bike swaps ends or stalls.
Work on progressive pressure: squeeze the front brake smoothly and let the weight transfer to the front tire before adding more. Use the rear brake for stability and to settle the chassis rather than to scrub speed on its own. Practice braking in a straight line on a loose surface until you can stop quickly without skidding.
Logs, Roots, and Rock Gardens
Obstacles that barely register on a road become the main event on single track. Two techniques cover most of them. For a log or a root step, compress the suspension just before it, unweight the front, and let the rear follow. For rock gardens, stay standing, keep light on the bars, and let the bike find its way through while you hold a steady throttle.
Start small. Rolling over a single small log repeatedly builds more skill than trying to clear a big one once. Add size only when the small version feels boring.
Hill Climbs and Descents
Climbs on single track are usually short and technical rather than long and fast. Momentum helps, but so does throttle control. Pick your gear before the base of the climb, stay standing, keep your weight forward, and stay smooth. If you lose traction, ease off and find grip again instead of spinning harder.
Descents demand the opposite body position. Shift your weight back, keep your arms bent, and use both brakes gently. Sit if you need more rear traction, stand if the surface is rough. The goal is control, not speed.

Fitness, Hydration, and Pacing
Single track is physically demanding in a way wide trails are not. Constant standing, clutch work, and balance drain your grip and forearms fast. Build some baseline cardio and grip strength before your first big day, and pace yourself on the trail.
Ride in shorter loops at first and take breaks. Drink water before you are thirsty. Fatigue is what turns a clean ride into a sloppy one, and sloppy riding in tight trees is how bikes end up in bushes.
Bike Setup and Prep
A few setup choices make single track easier. Hand guards protect your controls from branches. Well-adjusted levers let you reach the clutch and brake without stretching. Fresh tires with good edge grip matter more here than on hardpack roads.
Before you leave, do the basics: check tire pressure, chain tension, brake function, and fuel. The onX Offroad guidance puts it plainly: you would not leave home without a full tank of gas or a tool kit, so the same logic applies to preparing the bike and knowing where you are going.
Navigation and Riding With Others
Single track often lacks signage and cell coverage, so plan before you go. Mapping apps such as onX Offroad show satellite and topo maps and let you search for open dirt bike trails, including single-track, 50-inch, and full-width roads, plus moto tracks and riding areas. The app includes around 500K recreation points such as campsites and fuel stations, which helps when you are planning a full day out.
Ride with at least one other person when you are new to a system. Keep the group small, agree on a regroup point, and let the slower rider set the pace. Nobody learns anything while chasing a faster rider through trees they do not know.

Practice Drills You Can Do This Week
- Ten minutes of clutch-slip figure eights at walking pace.
- Standing riding on a smooth straight, holding your line with knees only.
- Progressive braking stops on loose dirt, front and rear together.
- Slow rolls over a small log or curb, front wheel unweighted.
- One tight-turn circuit around two markers, both directions.
Repeat these until they feel automatic. Skills built in a field show up on trail faster than most riders expect.
Trail Systems Where Riders Test These Skills
Riding guides consistently point to regions with well-known single track. Colorado lists areas including Rampart Range, Taylor Park, Rainbow Falls, La Sal Pass, Buffalo Creek, Cinnamon Pass, Indian Creek, and Holy Cross City. Near Las Vegas, riders mention Cottonwood, Red Rock Canyon, Blue Diamond, Bootleg Canyon, and Mount Charleston. The Upper Midwest has Nemadji, Paul Bunyan, and Huntersville State Forests.
| Region | Trail systems named in riding guides | Notes |
|---|---|---|
| Colorado | Rampart Range, Taylor Park, Rainbow Falls, La Sal Pass, Buffalo Creek, Cinnamon Pass, Indian Creek, Holy Cross City | Widely referenced for single track riding |
| Near Las Vegas | Cottonwood, Red Rock Canyon, Blue Diamond, Bootleg Canyon, Mount Charleston | Described as top-tier trail systems |
| Upper Midwest | Nemadji State Forest, Paul Bunyan State Forest, Huntersville State Forest | Listed among the top single-track areas in the region |
| Central Florida | Croom Motorcycle Area | 2,600 acres with sandy and single-track trails, open 7 days a week |
| Missouri | More than 31 moto areas | Includes technical rocky single track and flowing forest paths, with trail maps and difficulty levels |
Difficulty ratings and trail conditions change, so confirm current status with the managing agency or an up-to-date trail app before you drive out. A trail that was open and clear last season may be closed or rerouted this one.
The Bottom Line on Your First Single Track Ride
You do not need to be fast to ride single track. You need clutch control, a standing position you can hold, eyes that look ahead, and brakes you trust. Build those in a field and on wide trails first, then pick a system with shorter loops and ride it with a buddy. The trees will feel tight the first few times regardless. The difference is whether you arrive with the tools to handle them or you learn everything the hard way in the brush.
Frequently Asked Questions
How do I know if a trail is single track?
Single track is roughly one bike wide, with no room to ride side by side. Trail apps and maps often label routes as single-track, 50-inch, or full-width roads, which makes it easy to check before you go. If the description says single track, expect tight trees and limited passing room.
Can a beginner ride single track on a trail bike?
Yes, provided you build the basics first. Practice clutch control, standing position, and low-speed balance in an open area before hitting narrow trail. Then start on short loops in a system with easier options and ride with someone experienced. Trying technical single track as your very first off-road ride is the hard way to learn.
What should I bring on my first single track ride?
Water, a basic tool kit, and a way to navigate, since single track often lacks signage and coverage. Check your tires, chain, brakes, and fuel before leaving. Ride with at least one other person, agree on a regroup point, and confirm trail status with the managing agency or a current trail app.
How do I find single track trails near me?
Use a mapping app that distinguishes trail widths. onX Offroad shows satellite and topo maps and lets you search for open dirt bike trails, including single-track, 50-inch, and full-width roads, plus moto tracks and riding areas. State-by-state trail directories also list moto areas with maps and difficulty levels.
How long does it take to get comfortable on single track?
It varies with how often you ride and what you practice. Riders who drill clutch control and balance in a field between trail days tend to progress faster than those who only ride weekends. Give it several shorter rides before judging your comfort level, and build up loop length gradually.
Dirt Bike and ATV Trails Near Me: Sharing the Track With Four Wheels
A search for dirt bike and ATV trails near me usually turns up a pile of pins, screenshots, and forum threads that all point at the same handful of riding areas. The hard part is not finding a trail. The hard part is figuring out which of those trails actually allow both machines, which ones are bike-only, and how to ride a shared corridor without turning a fun day into a close call with a quad you never saw coming.
Most trail listings are clearer than riders expect once you know what to look for. Width limits, trail ratings, and one-way designations tell you almost everything about whether a route suits a dirt bike, an ATV, or both. Read those three things first and you can skip a lot of wasted driving.
Start With the Width Limit
Trail directories that cover mixed-use riding frequently describe ATV-friendly routes as accessible for vehicles up to 50 inches wide, a category built for ATVs and smaller off-road machines. That single number is the most useful filter in the whole listing.
Think about what it means in practice. A dirt bike is far narrower than 50 inches, so any trail that will accept a 50-inch machine will physically accept a bike. The reverse is not true. A single-track line that a bike slips through easily can be completely closed to a quad, and often is by design.
So when a listing says a trail is open to vehicles up to 50 inches wide, read it as a shared route. When a listing says single-track, read it as motorcycle territory. Listings for areas around Champaign, Illinois, Austin, Texas, and Bentonville, Arkansas all use that same 50-inch phrasing to describe their ATV-accessible routes, which makes the language worth recognizing wherever you ride.
Trail Types You Will See on the Same Map
Mixed-use areas rarely offer one kind of trail. They stack several, and each one behaves differently when bikes and four wheels share the same parking lot.
- Single-track motorcycle trails. Narrow, one-rider-wide routes. Listings for the Red Spring area near Redington Pass describe an extensive network of single-track trails, which is bike country, not quad country.
- Jeep roads and wide two-track. The same Redington Pass listings describe one ATV trail and plenty of jeep roads that are very rocky. Wide enough for four wheels, rough enough to demand attention on two.
- Designated OHV parks with open riding zones. Managed areas with acreage set aside for free riding, plus marked loops and hill climbs.
- Rated, one-way trail systems. Loops with difficulty ratings and directional travel, which is the safest format for mixed traffic.
Knowing which type you are heading for changes what you pack, how fast you ride, and how visible you need to be.
Three Mixed-Use Areas Worth Studying
You do not need to ride these specific parks to learn from them. Their published layouts show what a well-organized shared facility looks like, and that pattern repeats across the country.
| Riding area | What the listing describes | Why it matters for mixed use |
|---|---|---|
| The Ridge, Alabama | Over 35 miles of marked and rated one-way trails, 15 miles of single-track motorcycle trails, a motocross track | Bikes get their own single-track while shared loops stay directional |
| Rathbun OHV Park, Iowa | Over 100 acres of designated riding area, trails, hills, and open riding zones for ATVs, side-by-sides, and dirt bikes | Open zones absorb mixed traffic without forcing bikes and quads into the same narrow line |
| Kewaunee Riverview ATV Park | 20 miles of trails with two ravines, a hill climb area, and an intense use challenge course | Features are separated, so technical sections can be managed one group at a time |

One-Way Ratings Matter More Than Trail Miles
A park with 15 miles of directional trails is usually a better bet for a mixed group than a park with 40 miles of unmarked two-way paths. Head-on collisions are the single biggest risk when bikes and quads share a corridor, and directional travel removes most of that risk before anyone touches a throttle.
Difficulty ratings do the rest of the work. Ratings let a bike rider and a quad rider in the same group pick different loops for an hour and meet back at the truck, instead of dragging a 50-inch machine onto a line it was never meant to handle. If a trail system publishes ratings, use them as intended rather than treating them as suggestions.
Where Bikes and Quads Genuinely Mix Well
Some terrain suits both machine types without much friction. Wide jeep roads are the obvious example. They are built for four wheels, they offer plenty of passing room, and they give a bike rider a chance to learn a rocky, technical line without being trapped in it.
Open riding zones work well too. Riders can spread out, choose their own lines, and avoid stacking up behind slower traffic. Motocross tracks and dedicated practice tracks are effectively bike-only environments inside a shared park, which keeps the two styles of riding from colliding.
Marked one-way loops with a range of difficulty are the third good option. Everyone moves the same direction, faster riders can pass on the straights, and slower groups can wave people through without stopping the whole trail.
Where They Do Not Mix
Single-track is the clearest no. A quad physically will not fit, and a rider who tries anyway chews up the trail for everyone. Rock gardens and tight tree sections create the same problem in a different form. A bike can pick a line through the rocks. A 50-inch machine pushes them around and reshapes the trail over time.
Hill climbs deserve their own caution. A quad climbing a steep face has very little ability to stop or change direction, and a bike coming down the same hill has limited options too. Unless the park separates uphill and downhill traffic, treat hill climb areas as one-group-at-a-time features and wait your turn.

Passing and Being Passed on a Shared Trail
The rider behind is responsible for a safe pass, but the rider in front can make it easy or impossible. On a shared corridor, hold your line when you hear an engine closing in and let the faster rider commit to a side. Wobbling toward the noise is how two machines end up in the same rut.
If you are the one passing, be patient on blind corners and crests. A quad takes up most of a two-track, and the driver may not be able to move over even if they want to. Wait for open ground, make your move decisively, and give a wave once you are clear.
Visibility helps more than anything else. Running a headlight, wearing bright gear, and keeping your speed reasonable on blind sections costs nothing and buys time.
Prep Your Bike for Rougher Shared Ground
Trails shared with quads tend to be looser, rockier, and more chewed up than bike-only single-track. Skid plates and hand guards earn their keep quickly in that environment. Tire choice matters too, since loose climbs and rocky descents punish a worn rear.
Carry the basics. Water, a way to fix a flat, and a plan for what happens if a machine breaks down miles from the trailhead. A quad can often tow a disabled bike out. A bike cannot return the favor, which is one more reason to be generous with the four-wheel crowd on the trail.
How to Actually Find Trails Near You
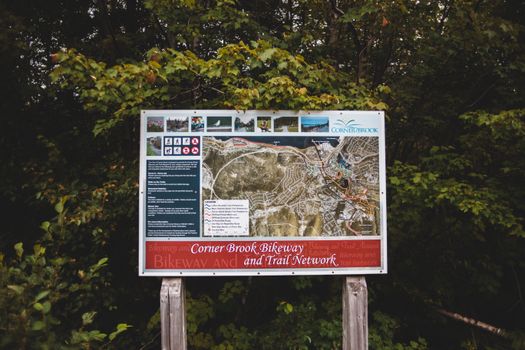
Search tools do a lot of the work if you use the right words. Try your city or region combined with ATV trails, OHV park, or riding area, and check the results against the source. Trail databases such as TrailLink publish descriptions, reviews, photos, and maps for local ATV trails, and those reviews often reveal conditions the official listing leaves out.
County and state park departments are worth checking directly. Los Angeles County park listings, for example, point riders toward designated off-highway vehicle areas roughly 12 miles east of the city. State-level OHV programs are usually the authority on which trails are open and which have width restrictions.
Confirm Permits and Closures Before You Drive
Permit requirements vary widely and change often. Listings for the Redington Pass area note that a permit is part of the picture there, which is a reminder to confirm the current rule with the managing agency before you load the truck. The same goes for seasonal closures, fire restrictions, and any recent storm damage.
Verify entry fees, hours, and current trail status with the official land manager or park office. Trail databases and forum posts are useful for planning, but they go stale. One phone call or one look at the official page saves a wasted trip.
Frequently Asked Questions
Can I ride a dirt bike on ATV trails?
Often yes. Trails described as open to vehicles up to 50 inches wide will physically accept a dirt bike, since a bike is much narrower. Check the specific designation anyway, because many systems set aside single-track routes for motorcycles only and expect bikes to stay off dedicated quad loops.
What does a 50-inch trail mean?
It describes a route built for machines up to 50 inches wide, which covers most ATVs and smaller off-road vehicles. A dirt bike fits easily within that limit. If your quad or side-by-side is wider than the stated number, that trail is not open to you regardless of how the map looks.
Are one-way trails safer for mixed groups?
They generally are. Directional travel removes head-on encounters, which is the biggest risk when bikes and quads share a corridor. Rated one-way loops also let a mixed group split up by skill level and meet back at the trailhead without forcing every rider onto the same terrain.
Do I need a permit to ride OHV trails?
Sometimes. Requirements vary by state, county, and individual riding area, and some listings mention permits as a condition of access. Confirm the current rule with the park office or managing agency before you drive out, and ask about seasonal closures at the same time.
How do I find ATV and dirt bike trails near me?
Search your city or region with terms like ATV trails or OHV park, then cross-check the results. Trail databases publish maps, photos, and rider reviews, while county and state park departments list designated off-highway vehicle areas and their rules. Always verify conditions with the official source before riding.
Dirt Bike Rental and Trails Near Me: Try Before You Buy in 2026
A rental day is a practical way to find out whether a bike fits before you buy it. In 2026, rental listings and trail names are easy to find, but the useful details are spread across operator pages, local listings and trail reports. Use the examples below as call targets, then confirm availability, delivery and trail access before you pay. A dirt bike rental and trails near me search works best when you plan the trail first and the rental second.
Start With the Trail, Then Find the Rental
Search results often mix shops, tour operators and trail lists. Pick the riding area first, then find a rental business that serves it. The research pack shows why this matters: COSDIRTBIKERENTALS delivers to wilderness trails near Colorado Springs, Canon City and Pueblo, while a Utah listing points to the Arapeen OHV Trail System in Manti. Idaho names include St. Anthony Sand Dunes and McCall Area Trails. Build the day around the terrain, not just the nearest shop.
Rental Examples From 2026 Listings
These names come from 2026 rental search listings in the research pack. Treat them as starting points for calls, not confirmed availability or endorsements. Confirm fleet, trail access and terms directly with each operator.
| Area | Rental lead | Detail from the listing |
|---|---|---|
| Colorado Springs, Canon City and Pueblo, CO | COSDIRTBIKERENTALS | Delivers to wilderness trails near those areas. |
| Scottsdale, AZ | Ready to Ride Rentals; Elevated Outdoor Rentals; Dirt Riders West | Names in a 2026 Scottsdale rental listing. |
| Madison, WI area | Midwest Action Cycle; Road Track & Trail | Listing includes 2463 Vista Dr, Lake Geneva for Midwest Action Cycle. |
| Salt Lake City and Manti, UT | Utah dirt bike rental listing | Shows $139 for an 8-hour rental, 8:30am to 4:30pm, and 24-hour rentals available for $50; also references the Arapeen OHV Trail System in Manti. |
| Boise, ID | Intermountain Power Sport Rentals LLC | Phone (208) 467-6944 in the listing. |
| San Antonio, TX | 281 Country Club; Enjoy the Mountain ATV Adventures & Tours; A To Z Outdoor Power | Names in a 2026 San Antonio rental listing. |
What a Try-Before-You-Buy Rental Actually Tests
A rental is not a full ownership test, but it gives real seat time. Focus on fit, power delivery, weight, suspension feel, brakes and clutch. Ride standing and sitting. Notice whether the bars, levers and pegs feel natural. A bike that feels good in the first five minutes may feel heavy after an hour. Take notes after each ride so the test produces a shortlist instead of a blur.
Match the Rental Bike to the Terrain
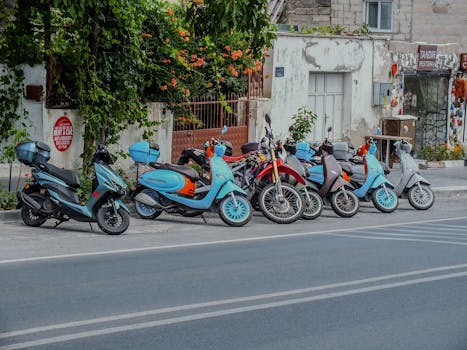
The pack includes sand dunes, OHV trails and wooded trail names. Ask what bike the operator plans to supply and whether it is set up for that terrain. For sand, ask about tire choice and engine size. For tight trees, ask about weight and gearing. For a first trail day, ask for a bike that lets you touch the ground and control the throttle without a fight.
Delivery Versus Pickup
Delivery helps if you do not have a trailer or a way to secure a bike. COSDIRTBIKERENTALS advertises delivery to wilderness trails near Colorado Springs, Canon City and Pueblo. Other operators may run from a shop or meet at a trailhead. Confirm the exact handoff point, who is responsible for the bike during the rental, and what happens if trail conditions change.
Questions to Ask Before You Book
Policies vary by operator, bike and season. A short call can clear up details that a listing page leaves out.
- Is the quoted price for the full rental period?
- Is delivery included, and what is the delivery area?
- What gear is included, and what should I bring?
- What deposit or damage policy applies?
- What are the age and experience requirements?
- What is the fuel policy, and what support is available for breakdowns?
- What is the cancellation or weather policy?
Save the answers in writing. If a detail is missing, ask again before you pay.
Trail Areas That Show Up in Rental Searches
Use these areas as search leads, then check current trail access, conditions and rental coverage with the operator or land manager.
Colorado Springs, Canon City, and Pueblo
COSDIRTBIKERENTALS is the Colorado lead in the pack. It advertises delivery to wilderness trails near Colorado Springs, Canon City and Pueblo. Ask which trail systems the operator currently serves before you book.
Scottsdale, Arizona
A 2026 Scottsdale rental listing names Ready to Ride Rentals, Elevated Outdoor Rentals and Dirt Riders West. Use those names as call targets and confirm current fleet and trail access before comparing rates.
Madison, Wisconsin Area
The Madison listing includes Midwest Action Cycle and Road Track & Trail. It also references 2463 Vista Dr, Lake Geneva for Midwest Action Cycle. The listing pairs a Madison search with a Lake Geneva address, so check the distance and pickup point before you plan the day.
Salt Lake City and Manti, Utah
A Utah listing shows $139 for an 8-hour rental from 8:30am to 4:30pm and 24-hour rentals available for $50. It also references the Arapeen OHV Trail System in Manti. Rates change, so confirm the total with the operator.
Boise, Idaho, and San Antonio, Texas
Intermountain Power Sport Rentals LLC appears as a Boise lead with phone (208) 467-6944. Idaho trail names include St. Anthony Sand Dunes and McCall Area Trails, with Bear Pete and Yellow Pine mentioned. In San Antonio, a 2026 listing names 281 Country Club, Enjoy the Mountain ATV Adventures & Tours, and A To Z Outdoor Power.
Build a Rental Day That Feels Like a Real Test
Bring your own helmet and boots if you have them, plus water and a phone. Ask the operator to walk you through the controls and the damage check. Take photos of existing damage. Start on an easy section, ride long enough to get past the first rush, and note what feels natural and what feels like work. If you are choosing between two sizes, ask about a swap before the day starts.
Red Flags to Clear Up Before You Pay
- The listing does not say where the bike can be ridden.
- The damage policy is vague or only explained by phone.
- Gear is described as included but sizes are not confirmed.
- The reservation is not confirmed in writing.
- Delivery time and place are left open.
These issues do not prove an operator is bad, but they mean you need more information. If the answers keep changing, book elsewhere.
Use the Rental to Narrow Your Buying List
After the ride, write down the bike size that felt right, the power delivery you preferred and the terrain where you had the most control. That short list is more useful than a showroom impression. The Motocross Life publishes buying guides and model reviews that can help after you have rental notes. A rental will not tell you everything about long-term maintenance, but it can stop you from buying the wrong size or style of bike.
Booking Checklist for 2026
- Choose a trail area from current local sources.
- Call two or three rental operators and confirm bike availability.
- Ask about delivery, gear, deposit, fuel and damage policy.
- Confirm rider requirements and experience level.
- Get the handoff time, place and contact number in writing.
- Check trail conditions and weather close to the date.
- Take photos at pickup and return.
Save the confirmation and the operator’s phone number where you can reach them. Then treat the rental as a test, not a race.
Frequently Asked Questions
How do I find dirt bike rental and trails near me?
Pick the trail area first, then call rental businesses that serve it. Search listings can point you to names in places such as Scottsdale, Boise, San Antonio, Salt Lake City, Colorado Springs and Madison, but you still need to confirm bike availability, delivery, rider requirements and current trail access with each operator.
Can I rent a dirt bike if I have never ridden before?
Rental policies vary, so ask the operator about beginner options, bike size and any instruction before booking. Do not assume a rental includes a lesson or gear. A smaller bike and an easy trail area can make a first day more manageable, but confirm what support the business provides and whether the terrain suits a new rider.
What should I check on the rental bike before riding?
Check the brakes, clutch, throttle, levers, tire condition, chain and fuel level. Ask the operator to explain the starting procedure and any quirks. Take photos of existing damage before you leave the handoff point. If a control feels wrong or a safety item looks worn, speak up before you ride rather than after.
Is a rental bike the same as the model I plan to buy?
Not necessarily. Rental fleets may use different model years, setups or bike sizes than the one you are shopping for. Use the rental to compare the category, weight and power delivery. If you want to test an exact model, ask the operator whether that bike is available before you book and confirm the year and model in writing.
How much does dirt bike rental cost?
A Utah listing in the research pack shows $139 for an 8-hour rental from 8:30am to 4:30pm and 24-hour rentals available for $50. Treat that as one data point, not a national rate. Prices vary by location, bike, duration, delivery and gear, so ask for the total cost and deposit before booking.
Public Dirt Bike Trails Near Me: Check Passes and Rules
Searching for public dirt bike trails near me returns a confusing mix of pins, forum threads, dealer pages, and directory listings. Some of those results point at land that is genuinely open to dirt bikes. Others point at routes that are open to hikers, horses, jeeps, or all-terrain vehicles but not to your two-stroke. A few point at private property that happens to appear on a map because someone uploaded a route file years ago. The difference between a great weekend and a citation usually comes down to one habit: confirming the manager, the pass, and the vehicle rules before the bike leaves the truck.
A Map Pin Is Not Permission
A trail showing up on a search result, a route file, or a directory does not mean dirt bikes are allowed on it. Directory sites collect listings from many sources, and dealership where-to-ride pages are written to be helpful rather than authoritative. That makes them excellent for generating ideas and poor for settling legal questions.
The practical fix is simple. Treat every listing as a lead, then verify it against the agency or business that actually controls the land. If you cannot identify that manager, you are not ready to ride there yet. This one step filters out most of the bad information that shows up in a “near me” search.
Start With the Agency That Manages the Land
Public riding areas are managed by specific agencies, and each one sets its own rules about vehicle type, permits, sound limits, and seasons. The agency’s own page is the version that counts when a ranger checks your bike at the staging area.
National Forest Service Trail Listings
Through the National Forest Service website, dirt bike riders can find authorized Off-Highway Vehicle trails. Those listings are built to display information about each trail, which makes them one of the most reliable starting points for public land. The key word in that sentence is authorized. A route that is not on the authorized list is not a trail you can assume is legal, even if it is worn in, wide, and obviously ridden by someone.
State Forests and Dedicated OHV Parks
State-level properties show up often in local trail roundups. Tahuya State Forest 4×4 Park, for example, appears among the top results for dirt bike trails around Tacoma, Washington. State forests frequently run their own pass systems, their own seasonal closures, and their own rules about which trails accept motorcycles. Confirm details with the state agency that runs the forest rather than relying on a review count or a rating.
Private Parks With Their Own Rules
Private riding parks sit outside public land rules entirely, and that is often their appeal. Mines and Meadows in Wampum, Pennsylvania, about 40 minutes north of Pittsburgh, is described as offering 84 miles of trails. A private park sets its own hours, its own fees, and its own machine requirements. Read the park’s current rules page directly, because those details change without any of the older blog posts catching up.
What a Trail Listing Actually Tells You
Not every listing is written in the same style, and the style tells you how much verification work is left. Some read like trail inventories. Others read like route itineraries. Knowing which one you are looking at saves a wasted trip.
| Listing style | Example | What still needs checking |
|---|---|---|
| Trail inventory | Red Spring, described as an extensive network of single-track trails created by TRS | Current status, vehicle type, and whether a pass or permit applies |
| Terrain note | Redington Pass, listed as one ATV trail plus lots of jeep roads and very rocky ground | Whether jeep roads are open to dirt bikes and whether your skill level suits the rock |
| Vehicle-specific | Cedar Springs OHV Trail in the northern portion of the Long Cane Ranger District, noted as managed for all-terrain vehicles | Whether motorcycles are included in that management designation at all |
| Route itinerary | Bridge of Dreams to Hunter Steel Bridge, and similar named routes near Akron, Ohio | Whether every segment along the route is open to dirt bikes |
None of these entries is useless. Each one points you toward a real place. The point is that each one leaves a specific question unanswered, and the unanswered question is the one that gets riders in trouble.
Read the Vehicle Description Twice
The Cedar Springs listing is the clearest illustration of why wording matters. A trail can be an OHV trail and still not be a dirt bike trail. All-terrain vehicle management is its own category, and motorcycles are not automatically folded into it.
Plenty of riders see OHV in a description and stop reading. Slow down at that word instead. Look for language naming motorcycles, dirt bikes, or two-wheeled vehicles specifically. If the description only names ATVs or only names 4×4 vehicles, treat the trail as unconfirmed until the managing agency says otherwise.
Names on a List Are Not the Same as Open Trails
Local roundups for Nashua, New Hampshire include entries such as Hersey Road, Mountain Road, Old Antrim Rd to Weston Rd to Depot Rd, Brimstone Corner Road, and Old Windsor Mountain. Read that collection again and notice what it is made of. Those are roads and road-to-road connections rather than trailhead names with a gate and a sign.
Route-style listings like that raise questions a single trail pin does not. Is the connecting stretch a public road where a registered bike is street legal? Is it a seasonal class of road open to vehicles? Does each segment have its own rule? Those answers live with the local land manager or highway department, not with whoever assembled the list.
This does not mean the routes are off limits. It means the listing is a starting point and the confirmation step is on you. A video walkthrough on finding more dirt bike trails legally makes the same argument in a different way, covering several methods for finding new riding rather than one magic list of guaranteed spots.
The Pass Questions to Ask Before You Load the Bike
Pass systems vary widely between agencies and parks, so there is no universal answer to sort out in a single search. What you can do is ask the right questions of the right office. Write these down and work through them in order.
- Who issues the pass for this specific area, and is it the state, a federal agency, or the park operator?
- Which vehicles does the pass cover, and does it cover the bike my kid will ride?
- Is the pass valid for a day, a season, or a set period, and when does it expire?
- Can it be bought at the site, or does it need to be arranged in advance?
- Does the area require anything beyond a pass, such as a spark arrestor, registration, or a sound limit?
- Are there seasonal closures or temporary closures in effect right now?
Ask these questions of the managing office directly. A dealer page or a directory entry can tell you that an area exists and roughly where it is, but the agency is the only party that can tell you what you need in your pocket at the gate.
Rules That Catch Riders Off Guard
Vehicle type is the rule most people check. The rest get skimmed, and they are the ones that end a ride early. Terrain notes matter too. A description of Redington Pass that calls the ground very rocky is telling you something about bike setup, tire choice, and whether a beginner should be there at all.
Beyond that, treat the day like a paperwork check. Confirm whether the staging area allows overnight parking. Confirm whether campfires, generators, or trailers have restrictions. Confirm whether the trails close after wet weather. Confirm whether one pass covers your whole group or one per bike. Each of these is a five-minute question on the phone and a potential wasted Saturday if you skip it.
A Simple Pre-Ride Check
- Pick two or three candidate areas from directories, maps, and local listings, including RiderPlanet USA, which describes itself as a directory of ATV trails, dirt bike trails, scenic OHV and UTV routes, and motocross tracks.
- Identify the manager for each area and open that manager’s own page.
- Confirm the vehicle types allowed and match them to the bikes in your group.
- Confirm pass requirements, cost structure, and where the pass is issued.
- Confirm current closures and recent conditions before you drive.
- Screenshot or print the confirmation so you have it at the staging area without cell service.
That routine takes maybe fifteen minutes. It also turns a vague “trails near me” search into a shortlist of places you can actually ride, with the paperwork already sorted before the first kick.
Frequently Asked Questions
How do I find public dirt bike trails near me?
Start with the National Forest Service website, which lists authorized Off-Highway Vehicle trails, then use directories such as RiderPlanet USA and local dealer where-to-ride pages to expand the list. Once you have candidate areas, confirm vehicle rules, passes, and closures with the agency or park that manages each one before you go.
Are all OHV trails open to dirt bikes?
No. Some trails are managed for all-terrain vehicles or for 4×4 use, and motorcycles are not automatically included. The Cedar Springs OHV Trail listing is a good example, since it is described as managed for all-terrain vehicles. Look for wording that names motorcycles specifically, or ask the managing agency directly.
Do public dirt bike trails require a pass?
Requirements differ by land manager, so there is no single answer. Federal, state, and private areas each set their own rules about passes, registration, and fees. Ask the office that manages the specific area you plan to ride, and confirm where the pass is issued and which vehicles it covers.
What should I confirm the night before a ride?
Confirm that the area is open, that your pass is valid and covers every bike in the group, and that no temporary closure went into effect. Check the current terrain and weather notes, make sure your machine meets sound and spark arrestor requirements if the area has them, and save the confirmation somewhere you can reach it without a signal.
Dirt Bike Trails Near Me: Finding Legal Riding Spots in 2026
Type “dirt bike trails near me” into a search bar and you get a strange mix of results. Some are genuinely useful trail directories with difficulty ratings, elevation profiles, and route lengths. Others are city parks, wildlife preserves, and rental businesses that got swept into a “best trails” list because a mapping algorithm saw the word “trail” somewhere nearby. A few are forum threads from years ago that may or may not still be accurate.
The result is that a lot of riders end up driving to a spot that never allowed dirt bikes in the first place, or skipping a legal area that was sitting twenty minutes from home. This guide walks through how to cut through the noise in 2026, confirm that a riding area is actually open to dirt bikes, and build a shortlist you can trust before you load the bike into the truck.
Why “dirt bike trails near me” returns so much noise
Most of the top results are directories, not land managers. Directories pull from map data, business listings, and user submissions, and they rarely filter out places where motorized use is prohibited. A quick look at real 2026 results shows the problem clearly. A “top 10 best dirt bike trails near Gilbert, Arizona” list includes Veterans Oasis Park, Ready to Ride Rentals, and the Riparian Preserve at Water Ranch. A similar list for Seattle, Washington mixes Tahuya State Forest 4×4 Park with Discovery Park. One of those is a motorized trail system, one is a rental business, and the others are parks with their own rules.
None of that means the directories are worthless. It means the listing is a starting point, not a verdict. The name on the list tells you the place exists. It does not tell you that your bike is welcome there.
Check the land manager before you trust the trail name
Every legal riding area is managed by somebody. That might be a state forest agency, a county parks department, a private landowner, a riding club, or a federal land office. Whoever manages it sets the rules on motorized use, sound limits, registration, seasonal closures, and staging.
Find that manager first. If a search turns up a trail name with no clear owner and no official page behind it, treat that as a red flag rather than a green light. A single official page from the managing agency is worth more than ten listicles. If you cannot identify who is responsible for the land, do not ride there until you can.
This step also protects access. Riding areas close when riders show up on land where bikes are not permitted, and the closures rarely get reversed.

Use a mapping app that shows difficulty, elevation, and length
Trail mapping apps are the most practical middle layer between a search engine and a land manager. onX Offroad, for example, offers trail browsing with interactive maps, trail difficulty, elevation, and length, along with a free trial and account login. That combination matters because it lets you compare a technical route against a flowing one before you commit a Saturday to it.
These apps also generate location-specific pages. Searches for dirt bike trails near National, Maryland, near North Little Rock, Arkansas, and near Ocean Springs, Mississippi all surface onX Offroad browse pages with the same map, difficulty, elevation, and length fields. That consistency makes it easy to scan several candidate areas in one sitting.
What an app still cannot do is grant permission. Use it to build the list, then confirm each entry with the managing agency. Apps also offer emergency tools such as onX SOS, which is a good backstop for remote riding, but it is not a substitute for telling someone where you are going.
What a 2026 trail search actually surfaces
The examples below come straight from current search results. They show the range of things that appear under the “dirt bike trails near me” label, and what you would need to confirm before riding each one.
| Where the result came from | Names that appeared | What to confirm |
|---|---|---|
| Riding areas and maps guide | San Manuel (very technical trails not used for racing), Marana (flowing single track), Red Spring (described as extensive) | Which club or agency manages each area and current route markings |
| Best trails near Tacoma, Washington (2026 list) | Tahuya State Forest 4×4 Park, Fort Steilacoom Park, Cedar River Trail | Whether each location permits dirt bikes at all |
| Best trails near Seattle, Washington (2026 list) | Tahuya State Forest 4×4 Park, Discovery Park | Motorized use rules and any staging requirements |
| Best trails near Gilbert, Arizona (2026 list) | Veterans Oasis Park, Ready to Ride Rentals, Riparian Preserve at Water Ranch | Park rules, rental terms, and preserve restrictions |
| Trails near Coulee City, Washington | Barker Canyon Road, Douglas Creek Creekside Campsite, Sand Dunes Site, Duffy Creek Overlook, Bird Reserve | Camping and staging access plus motor vehicle rules |
| Trails near Searcy, Arkansas | Ohana Trail, Keola Run, Iwa Ridge, Pineapple Express, Nalu Run | Difficulty, land status, and whether bikes are allowed |
Notice how many of those names are parks, preserves, campsites, and overlooks. A place can be a great outdoor destination and still be completely off limits to a dirt bike.
How to read a trail listing before you load the bike
Once you have a candidate, work through a short checklist. It takes a few minutes and saves wasted trips.
- Name and location. Confirm the name matches an official page, not just a directory entry.
- Manager. Identify the agency, club, or owner and look for a current rules page.
- Motorized designation. Look for an explicit statement that dirt bikes are allowed, not an absence of prohibition.
- Difficulty and length. Match the route to the least experienced rider in your group.
- Elevation and terrain. A trail described as very technical rides differently from flowing single track.
- Seasonal status. Check for closures before every trip, not once a year.
- Staging. Know where you can legally park, unload, and camp.
- Registration and sound requirements. Verify current requirements with the managing agency for your bike and your state.
If any line on that list comes back blank, keep digging or pick a different area.
Build a shortlist in one evening
- Open a trail mapping app and search your town plus “dirt bike trails” to see what is within a reasonable drive.
- Save three to five candidates with their difficulty, elevation, and length noted.
- Look up the managing agency for each one and read the current motorized use rules.
- Check closure notices and recent trail work updates.
- Read rider reports, but weigh them against official information. Conditions change faster than reviews do.
- Download the map for offline use, since cell coverage at staging areas is unreliable.
- Plan fuel, water, tools, and a meetup point, then share the plan with someone staying home.
Do this once and you end up with a personal list of legal areas ranked by distance and difficulty. Next time the search bar calls, you already know where you are going.
Match the trail to the rider
The riding area guides make a useful distinction between terrain types. San Manuel is described as having very technical trails that the guide does not race on, Marana as lots of flowing single track, and Red Spring as an extensive area. Those are three very different days on a bike.
Flowing single track rewards momentum and is usually the kinder introduction for a newer rider or a kid moving up from a smaller bike. Technical terrain demands clutch control, balance, and confidence, and it punishes a tired rider. Read the description honestly and pick the area that fits the weakest rider in your group, not the fastest.

Local knowledge fills the gaps
No directory knows that a trailhead gate was locked last month or that a section got rerouted after a storm. Local riders do. Bike shops, riding clubs, and trail work crews carry the kind of current information no listing can match, and they usually appreciate being asked.
Showing up to a trail work day is the fastest way to learn an area and to help keep it open. It also puts you in contact with people who know which routes suit which skill level.
Frequently Asked Questions
Are trails listed on Google Maps always legal to ride?
No. Directory and map results include parks, preserves, campsites, and rental businesses alongside genuine trail systems. A listing only confirms that a place exists. Before you ride, identify the agency, club, or landowner that manages the property and confirm in writing that dirt bikes are permitted there.
What is the fastest way to check if dirt bikes are allowed somewhere?
Find the managing agency and look for an explicit statement allowing motorized use. An absence of posted rules is not permission. If the official page is unclear, call the office or ask a local club before making the drive, and never assume a trail name in a directory means the land is open to bikes.
Should I rely on a trail app or on local riders?
Use both. A mapping app with trail difficulty, elevation, and length is excellent for building a shortlist and comparing terrain types. Local riders and clubs know current conditions, recent closures, and reroutes. Confirm access with the managing agency, then use local knowledge to fill in the details an app cannot show.
How do I find beginner-friendly dirt bike trails near me?
Filter your shortlist for flowing single track rather than technical terrain, and check the length and elevation profile so you are not committing to a route longer than your group can handle. Bring the least experienced rider into the decision, and start with a shorter route you can repeat once confidence builds.
What should I do if I arrive and the area is closed?
Do not ride anyway. Closures exist for reasons that range from seasonal protection to active logging or storm damage, and riding through one is the fastest way to damage access for everyone. Check for an alternate legal area on your map, or head home and confirm status with the managing agency before your next attempt.
Dirt Bike Riding Trails Near Me: Find Open Ground in 2026
Typing “dirt bike riding trails near me” into a search bar usually produces a messy pile of results: a top ten list with a photo of a hiking path, a forum thread from several seasons ago, and a map app that wants an account before it shows you a single trail. The information exists, but it is scattered across trail databases, state riding directories, and dealership ride pages that were built for locals rather than search engines. The trick is knowing which sources actually describe legal, rideable ground and which ones just recycle a list of park names.
This guide walks through where the reliable trail information lives, what a good trail listing actually tells you, and how to check a spot before you burn a tank of fuel getting there.
Start With a Trail Database Built for Off-Road Use
General map apps are built for pavement. Off-road trail databases are built for dirt, and they usually show the details that matter to a rider: trail length, technical rating, elevation, and the best time of year to ride a given route. Those are the exact filters that show up on trail pages for areas like Snohomish, Washington, where listings are organized by trail length, technical rating, and season so you can sort a long list of options down to something that fits your bike and your schedule.
What makes these databases useful is the structure. A page for a region will typically show an interactive map, a difficulty rating for each route, distance, elevation change, and a note on when the trail is usually rideable. That is a very different experience from scrolling a social media post where someone says “great trails out past the highway” and nothing else.
Searching by town name rather than by state is the fastest way in. Listings exist for places as different as Snohomish, Washington; Lexington, South Carolina; Vineland, New Jersey; and Irvine, California. Each area has its own mix of short loops, long backcountry routes, and trailhead access points, so a search that works in one region will not look the same as another.
What a Good Trail Listing Actually Tells You
The details are where the value sits. A single well-documented trail page can tell you distance, difficulty, surface, and where the route starts, which is often enough to decide whether it is worth a drive. Here is how that looks across a few examples pulled from public trail listings:
| Trail or Area | Region | What the Listing Shows |
|---|---|---|
| Trail 23 | Near Lexington, South Carolina | A 2.5-mile moderate trail that begins at the end of Service Road 21; shady, hard-packed dirt and relatively flat |
| Green Mountain Road / NF-011 | Near Snohomish, Washington | Appears in an interactive trail list organized by length, technical rating, and best time of year |
| Batsto Fireline Trail | Near Vineland, New Jersey | One of several named dirt bike trails catalogued for that area |
| Quail Hill Trailhead | Near Irvine, California | Appears at the top of a 2026 roundup of best dirt bike trails near Irvine |
Notice how much a listing like Trail 23 gives you in one line. A moderate 2.5-mile route on hard-packed dirt that is relatively flat is a very different proposition from a steep single-track climb. That description alone tells a newer rider they can probably handle it and tells an experienced rider they might want something with more bite.
Verify Motorized Access Before You Drive Out
Trail roundups are not always careful about the difference between a hiking trailhead and a motorized route. A “best trails near me” list can pull in walking paths, scenic overlooks, and multi-use greenways alongside actual dirt bike ground. The trail name alone does not confirm that a dirt bike belongs there.
Before committing to a trip, confirm three things. First, that motorized use is allowed on that specific route rather than just somewhere in the general area. Second, that the route is currently open, since closures and seasonal restrictions change far more often than blog posts get updated. Third, that the entry point is reachable by vehicle with a trailer or a truck bed, because a trail that starts at the end of a service road is a different logistics problem than one that starts from a paved parking lot.
Land management agencies are the authoritative source on all three. Trail database pages are a strong starting point for discovery, but the final word on whether a route is open to dirt bikes should come from whoever manages that land.
Regional Ride Lists Are Often Better Than National Search Results
National search results tend to surface the same handful of famous areas over and over. Local ride lists cover the ground that actually sits within driving distance of where you live.
Powersports dealers are an underrated source here. Rexburg Motor Sports maintains a Places to Ride page for southeast Idaho that includes entries like Moody Island Park, the St. Anthony Sand Dunes, Hell’s Hole, Burns Canyon, and Noise Park, a motocross track. The page even notes trail width, which matters when you are figuring out whether a route suits a full-size bike or something smaller. Redline Powersports in Sumter, South Carolina runs a similar Where To Ride page covering ATV trails, dirt bike tracks, off-road parks, and scenic motorcycle routes for riders planning a trip from that area.
State-level trail guides fill in the rest. Utah Moto Trails, for example, is built specifically around planning dirt bike and ATV motorized trail riding adventures, and it bundles maps, GPS files, and video into one place. A state guide like that does the work of a dozen scattered forum posts.
Directories that collect riding areas and maps for a state are another good stop. One such directory lists Red Spring as a dual sport dirt road ride with an extensive network of single-track trails created by TRS, and Redington Pass as an area with one ATV trail and lots of jeep roads. Those two entries describe completely different riding days, and that distinction is exactly what you need before you pick a spot.

Match the Ground to the Bike and the Rider
Not every trail that fits your tires fits your skill level or your machine. Trail listings usually carry a technical rating for a reason, and the rating system is the single most useful filter on the page.
Hard-packed, relatively flat two-track like the Lexington area’s Trail 23 is friendly ground for a beginner or a smaller bike. Sand dunes, like the St. Anthony Sand Dunes entry on the Idaho ride list, demand a completely different technique and reward horsepower and momentum. A motocross track like Noise Park is a third category entirely, with jumps and berms rather than trees and rocks. Jeep road networks with a single ATV trail mixed in are a fourth.
Being honest about which of those categories fits your Saturday is what separates a good ride from a long, frustrating day. A rider on a trail bike who ends up at a motocross track, or a beginner who ends up on an expert single-track network, is going to have a bad time regardless of how good the trail is.
A Search Routine You Can Run in an Evening
- Search your town name plus “dirt bike trails” in a trail database built for off-road use, so results come back with maps, length, difficulty, and elevation instead of blog spam.
- Sort or filter by technical rating and trail length to match your bike and how much time you have.
- Cross-check the same area against a state trail guide or a regional ride list from a local powersports dealer.
- Confirm motorized access and current status with the land manager before you plan the drive.
- Save the trailhead location and a backup option, because one closed gate should not end the day.
Running that sequence takes an hour or so and saves far more than that in wasted trips. The backup trail matters more than most riders expect, since a single closure or a full staging area can otherwise turn a planned ride into a drive home.
Mistakes That Waste a Riding Day
- Trusting a “top ten trails near me” list without checking whether dirt bikes are permitted on each entry.
- Ignoring the technical rating and assuming a short trail is an easy trail.
- Skipping the elevation and season notes, then arriving to find a route that does not suit the conditions.
- Relying on a single source instead of confirming with the land manager.
- Showing up with no second option if the first staging area is closed or full.
Each of these is easy to avoid with a few minutes of cross-referencing, and each one is a common reason riders end up driving home without ever unloading the bike.
Frequently Asked Questions
What is the fastest way to find dirt bike trails near my town?
Search your town name inside a trail database built for off-road use rather than a general search engine. Those listings typically include an interactive map plus trail length, technical rating, elevation, and best time of year, which lets you sort by what actually fits your bike instead of scrolling through unrelated results.
Are all trails in “best trails near me” lists open to dirt bikes?
No. Roundup lists can mix hiking trailheads, scenic paths, and multi-use routes in with genuine motorized ground. A named trailhead appearing on a top ten list does not confirm that dirt bikes are allowed there, so verify motorized access with the agency that manages the land before you plan a trip.
Where can I find trail maps and GPS files for a specific state?
State-focused trail guides exist for exactly this purpose. Utah Moto Trails, for instance, is built around planning dirt bike and ATV motorized riding adventures and bundles maps, GPS data, and video in one place. Regional ride lists published by local powersports dealers often cover additional areas that national search results miss entirely.
How do I know if a trail suits my skill level?
Look at the technical rating, length, elevation, and surface description in the listing. A 2.5-mile moderate trail on shady, hard-packed, relatively flat dirt reads very differently from an expert single-track network or a sand dune area, and matching that description to your experience level is the most reliable filter available.
Do dealer ride lists cover more than trails?
Often yes. Dealer ride pages frequently mix ATV trails, dirt bike tracks, off-road parks, and scenic motorcycle routes, and some note details like trail width. That variety is useful because it lets you compare a motocross track against a backcountry route in the same region without running separate searches.
The short version: discovery is fast when you use a database built for dirt, verification is what keeps the day from going sideways, and a backup trail in your pocket makes the whole plan more resilient. Do those three things and the search stops being a gamble.
Choosing the Right Chest Protector for Dirt Biking: A Comprehensive Guide
Dirt biking presents an exhilarating experience, catering to riders of varying skill levels with its thrills and excitement. Nonetheless, like any high-speed endeavor, prioritizing safety is paramount. A chest protector is indispensable for every dirt biker among the crucial protective gear. This thorough guide will explore all the essential aspects to consider when selecting the suitable chest protector for your dirt biking escapades.
Quick Tips:
Prioritize Protection: Look for chest protectors with high-impact absorption capabilities to shield your chest and vital organs from injuries.
Ensure Proper Fit: Choose chest guards featuring customizable straps and size variations to guarantee a secure and comfortable fit.
Consider Ventilation: Choose chest protectors with adequate ventilation systems to keep you cool and comfortable during long rides.
Read Reviews: Research and compare reviews from fellow dirt biking enthusiasts to find the best chest protector.
Don’t Forget Maintenance: Regularly clean and inspect your chest protector to ensure it remains in top condition and provides optimal protection.
Understanding Chest Protectors
Before delving into the intricacies of choosing a chest protector, it’s essential to understand what they are and why they’re crucial for dirt biking safety. Chest protectors are specially designed pieces of gear that are worn over the torso to protect the chest, ribs, and vital organs from impacts and injuries during falls or crashes.
Numerous chest protectors can be found in the market, each providing different degrees of protection and comfort. Traditional hard-shell chest protectors feature rigid outer shells made of durable materials such as plastic or carbon fiber, providing maximum impact resistance. On the other hand, soft-shell chest protectors utilize foam padding or gel inserts to absorb impacts while offering increased flexibility and comfort.
Hybrid chest protectors combine elements of both hard-shell and soft-shell designs, offering a balance of protection and comfort for riders. When choosing a chest protector, consider your riding style, terrain, and personal preferences to determine which type best suits your needs.
Considerations to Keep in Mind When Selecting a Chest Guard
When shopping for a chest protector, there are several factors to keep in mind to ensure you select the right one for your needs:
Level of Protection: Consider the necessary level of protection depending on your riding preferences and the terrain you plan to navigate. If you’re an aggressive rider who frequently encounters rough terrain, opt for a chest protector with high-impact absorption capabilities.
Fit and Comfort: Proper fit ensures maximum protection and comfort while riding. Look for chest protectors with adjustable straps and sizing options to accommodate your body shape and size. Additionally, consider padding and ventilation to enhance comfort during long rides.
Material and Construction: Evaluate the materials and construction of the chest protector to ensure durability and effectiveness. Hard-shell chest protectors are known for their rugged construction and superior impact resistance, while soft-shell chest protectors offer increased flexibility and comfort.
Additional Features: Consider any other features or accessories that may enhance the functionality of the chest protector. Features like neck bracing compatibility, hydration system integration, and storage pockets can add convenience and versatility to your riding experience.
Tips for Proper Maintenance and Care
After choosing the ideal chest protector, upholding its proper maintenance for continued effectiveness and optimal protection is crucial. Below are some guidelines for taking care of it:
Cleaning and Storage: Regularly wash your chest protector using a mild soap and water combination to eliminate dirt and debris. Steer clear of harsh chemicals or solvents as they can harm the materials. After cleaning, ensure the chest protector thoroughly air-dries before storing it in a cool and dry place, avoiding direct sunlight.
Inspection for Wear and Tear: Regularly examine your chest protector for indications of damage, such as cracks, tears, or loose straps. Replace any damaged components immediately to maintain the integrity of the chest protector.
Replacement Schedule: Chest protectors undergo noticeable wear and tear, particularly with frequent usage. As a general guideline, replacing your chest protector every few years or if it experiences substantial damage from a collision or impact is advisable.
Reviews of Top Chest Protectors on the Market
To help you narrow down your options, we’ve compiled reviews of some of the top chest protectors available on the market:
Alpinestars A-1 Roost Guard: Known for its lightweight and ergonomic design, the Alpinestars A-1 Roost Guard offers excellent protection without sacrificing comfort. Its adjustable straps and ventilation system are ideal for long rides in varying terrain.
Fox Racing R3 Roost Deflector: The Fox Racing R3 Roost Deflector features durable polycarbonate construction and strategically placed vents for maximum airflow. Its low-profile design and customizable fit make it popular among dirt biking enthusiasts.
Leatt 3DF AirFit Lite Body Protector: Constructed from Leatt’s proprietary 3DF AirFit foam, this body protector offers superior impact absorption and flexibility. Its slim profile and moisture-wicking properties make it a favorite among riders seeking lightweight and breathable protection.
Real-Life Testimonials and Experiences
To provide firsthand insights into the effectiveness and comfort of chest protectors, we reached out to experienced dirt biking enthusiasts for their testimonials and experiences:
John, an avid motocross rider, swears by his Alpinestars A-1 Roost Guard, praising its lightweight and breathable design that allows him to focus on the ride without feeling restricted.
Sarah, a trail rider and enduro enthusiast, relies on her Fox Racing R3 Roost Deflector for its durable construction and customizable fit, providing peace of mind during challenging off-road adventures.
Mark, a competitive racer, credits his Leatt 3DF AirFit Lite Body Protector for protecting him from severe injuries during high-speed crashes, highlighting its superior impact absorption and comfort.
Comparison of Top Chest Protectors
Brand/Model Features Pros Cons
Alpinestars A-1 Roost Guard Lightweight design, adjustable straps, ventilation system Excellent protection, comfortable fit, ergonomic design Limited color options may run small for some riders
Fox Racing R3 Roost Deflector Polycarbonate construction, customizable fit, strategically placed vents Durable and breathable, customizable fit, low-profile design Slightly bulky compared to other models, it may restrict movement for some riders
Leatt 3DF AirFit Lite Body Protector 3DF AirFit foam construction, slim profile, moisture-wicking properties Superior impact absorption, flexible and breathable, moisture-wicking properties Limited adjustability, higher price point compared to other models
This chart outlines critical details of leading chest protectors in the market, emphasizing their attributes, advantages, and disadvantages. It aims to assist you in making a well-informed choice tailored to your requirements and preferences.
Conclusion
Choosing the suitable chest protector is not just a matter of picking any available option; it’s about selecting a piece of gear that can save your life in a crash or impact. When choosing the appropriate dirt biking gear, it’s crucial to consider several factors, including the level of protection provided, the fit, comfort, quality of materials and construction, and any extra features it may include. By carefully weighing these aspects, you can make a well-informed choice that prioritizes your safety and enhances your overall riding experience.
Investing in a high-quality chest protector is an investment in your well-being and peace of mind on the trails. Whether you’re a casual rider hitting the trails on weekends or a competitive racer pushing the limits of speed and endurance, having a suitable chest protector can make all the difference in your dirt-biking experience.
It’s important to remember that maintaining and caring for your chest protector is crucial to ensure its durability and effectiveness. Regularly cleaning, checking for signs of wear and tear, and promptly replacing damaged components are essential to keep your protective gear in optimal condition.
Above all, never compromise on safety. While dirt biking is undeniably thrilling and adrenaline-pumping, it also comes with inherent risks. Choosing a chest protector that offers superior protection and comfort can give you the confidence to tackle challenging terrain and push your limits while minimizing the risk of injuries.
So, before you embark on your next dirt biking adventure, take the time to research and select the chest protector that best suits your needs and preferences. Whether you opt for the lightweight design of the Alpinestars A-1 Roost Guard, the customizable fit of the Fox Racing R3 Roost Deflector, or the superior impact absorption of the Leatt 3DF AirFit Lite Body Protector, make safety your top priority and enjoy the ride with peace of mind.
Unleashing the Thrill: A Comprehensive Guide to 50cc Dirt Bikes
Introduction
Dirt biking is more than a hobby; it’s a thrilling adventure that beckons riders of all skill levels. For those looking to embrace the dirt trail with an entry-level machine, the 50cc dirt bike is an excellent choice. This comprehensive guide delves into the world of 50cc dirt bikes, exploring their history, technical specifications, riding experience, and much more. Whether you’re a beginner seeking an adrenaline rush or an experienced rider searching for an elegant off-road companion, this guide aims to be your go-to resource for everything related to 50cc dirt bikes.
Quick Tips for 50cc Dirt Bike Enthusiasts
Before we plunge into the depths of the 50cc dirt bike universe, here are some quick tips to keep in mind:
Safety First: Prioritize safety by investing in high-quality protective gear, including helmets, gloves, and body armor.
Maintenance Matters: Regularly check and maintain your 50cc dirt bike for optimal performance and longevity. DIY enthusiasts can find joy in hands-on maintenance tasks.
Join the Community: Connect with fellow 50cc dirt bike enthusiasts through riding clubs, online forums, and events to share experiences and gain valuable insights.
Now, let’s embark on a journey through the fascinating terrain of 50cc dirt biking.
History and Evolution
Origins of 50cc Dirt Bikes
The 50cc dirt bike, a miniature powerhouse, has humble beginnings rooted in the evolution of off-road motorcycling. Initially designed for novice riders, these bikes gradually gained popularity due to their manageable size and accessible power.
Milestones in the Development of 50cc Dirt Bikes
Over the years, manufacturers have fine-tuned 50cc dirt bikes, introducing innovative features and designs. From enhanced suspension systems to advanced engine technologies, the evolution of these bikes has transformed them into versatile off-road machines.
Technical Specifications
Engine Power and Performance
The heart of a 50cc dirt bike lies in its engine. We explore the power and performance metrics, helping riders understand the capabilities of these machines and how they translate to the off-road experience.
Frame and Suspension Design
A sturdy frame and responsive suspension are crucial for navigating challenging terrains. We dissect the structural elements of 50cc dirt bikes, shedding light on design considerations that impact ride quality.
Tire and Brake Systems
Traction and stopping power are paramount in off-road riding. Dive into the specifics of tire configurations and brake systems, discovering how these components contribute to the overall control of a 50cc dirt bike.
Riding Experience
Accessibility for Beginners
One of the critical attractions of 50cc dirt bikes is their accessibility for beginners. We explore how these bikes provide a gentle introduction to off-road riding, gradually allowing novice enthusiasts to build confidence.
Skill Development for Novice Riders
Beyond accessibility, 50cc dirt bikes offer a platform for skill development. Discover how novice riders can hone their off-road skills, preparing themselves for more challenging terrains and higher-powered bikes in the future.
Thrill and Adventure for Experienced Riders
Experienced riders seeking a different kind of thrill will find solace in the agility and maneuverability of 50cc dirt bikes. Uncover how these bikes cater to seasoned riders looking for a unique off-road experience.
Safety Considerations
Importance of Protective Gear
Safety is paramount in any off-road activity. We emphasize the significance of investing in quality protective gear and guide you in choosing the right equipment for a safe riding experience.
Training and Education for Riders
Proper training lays the foundation for safe and enjoyable dirt biking. Explore the training resources available for 50cc dirt bike riders, ensuring that enthusiasts are well-prepared for the challenges of off-road riding.
Safety Features in 50cc Dirt Bikes
Manufacturers incorporate various safety features into 50cc dirt bikes. Uncover the technologies and design elements that enhance rider safety, making these bikes suitable for riders of all skill levels.
Maintenance Tips
Routine Checks and Inspections
Consistent upkeep is essential for ensuring the prolonged lifespan of a dirt bike. We outline necessary routine checks and inspections that riders can perform to keep their 50cc bikes in top-notch condition.
Common Issues and Troubleshooting
Even the most dependable machines may face challenges. Explore common problems faced by 50cc dirt bike owners and gain insights into troubleshooting techniques, empowering riders to address issues promptly.
DIY Maintenance for Enthusiasts
For enthusiasts who love getting their hands dirty, DIY maintenance is a rewarding aspect of dirt biking. Discover step-by-step guides for basic DIY tasks, fostering a connection between riders and their machines.
Choosing the Right 50cc Dirt Bike
Factors to Consider
Selecting the right 50cc dirt bike involves considering various factors such as size, weight, and intended use.
We offer a thorough handbook to assist riders in making well-informed decisions tailored to their preferences and needs.
Top Brands and Models in the Market
Explore the landscape of 50cc dirt bike brands and models, highlighting top contenders that have earned riders’ trust. Compare features and performance to find the perfect match for your off-road adventures.
Budget-Friendly Options for Different Riders
Not every enthusiast has an unlimited budget. We delve into budget-friendly options, ensuring riders find a reliable 50cc dirt bike that aligns with their financial constraints without compromising quality.
Community and Culture
Riding Clubs and Events
Connecting with like-minded individuals enhances the dirt biking experience. Discover riding clubs and events that bring together 50cc dirt bike enthusiasts, fostering a sense of community and shared passion.
Online Forums and Communities
In the digital age, online forums are crucial in community building. Explore virtual spaces where riders exchange tips, discuss experiences, and seek advice on 50cc dirt biking.
Sharing Experiences and Tips
Personal stories and tips from seasoned riders add depth to the dirt biking community. Read about real-world experiences and gain valuable insights from those who have explored the trails on their 50cc machines.
Environmental Impact
Fuel Efficiency and Emission Control
In a time when environmental awareness is crucial, we investigate the fuel efficiency and emission control mechanisms integrated into 50cc dirt bikes. Learn how manufacturers are contributing to eco-friendly off-road adventures.
Responsible Riding Practices
Preserving off-road environments requires responsible riding practices. We discuss eco-friendly riding habits and responsible trail etiquette, ensuring riders have minimal impact on the natural landscape.
Trends in Eco-Friendly 50cc Dirt Bikes
Stay abreast of the latest trends in eco-friendly dirt biking. Discover how manufacturers integrate sustainability into the design and production of 50cc dirt bikes, contributing to a greener off-road experience.
Future Innovations
Technological Advancements in the 50cc Dirt Bike Industry
The future of 50cc dirt biking holds exciting technological advancements. Explore emerging technologies that promise to enhance the performance, safety, and overall riding experience of 50cc dirt bikes.
Anticipated Changes and Developments
As the off-road industry evolves, so do the expectations of riders. Delve into anticipated changes and developments in the 50cc dirt bike sector, providing a glimpse into the innovations that will shape the future of off-road riding.
Related Table: Comparison of Top 50cc Dirt Bike Models
Model Engine Power Frame Design Suspension System Brake System Tire Configuration Price Range
Yamaha PW50 50cc Lightweight, Durable Telescopic Front Fork Drum Brake (Front/Rear) Knobby Tires $1,500 – $1,800
Honda CRF50F 49cc Steel Frame Inverted Fork Drum Brake (Front/Rear) Knobby Tires $1,600 – $1,900
KTM 50 SX Mini 49cc Chromoly Steel Frame WP XACT Suspension Disc Brake (Front/Rear) Knobby Tires $3,500 – $4,000
Suzuki DR-Z50 49cc High-tensile Steel Frame Telescopic Front Fork Drum Brake (Front/Rear) Knobby Tires $1,800 – $2,100
Kawasaki KLX110 112cc High-tensile Steel Frame Inverted Fork Drum Brake (Front/Rear) Knobby Tires $2,300 – $2,600
Kindly be aware that the mentioned prices are estimations and could fluctuate depending on the geographical area and specific dealership.
This table provides a snapshot of some popular 50cc dirt bike models, allowing riders to compare key features and price ranges before making an informed purchase decision.
Conclusion
In the exhilarating realm of 50cc dirt bikes, we’ve traversed the trails of history, dissected the engines’ heartbeats, and explored the diverse terrains these machines conquer. From the adrenaline-fueled experiences they provide to the essential safety considerations, this comprehensive guide has been your compass in navigating the captivating world of 50cc dirt biking.
As the dust settles, it’s evident that 50cc dirt bikes are not merely machines; they are gateways to adventure, embracing both beginners and seasoned riders alike. The accessibility for novices opens doors to new horizons, fostering skill development and paving the way for a lifelong love affair with off-road exploration.
But it’s not just about the technical specifications or the rush of wind against your helmet. It’s about the community that rallies around the shared passion for dirt biking. Riding clubs and online forums become virtual pit stops where experiences are shared, advice is given, and friendships are forged, further enriching the dirt biking journey.
There’s an unwavering sense of responsibility in the echoes of revving engines and the camaraderie of fellow riders. The trails we ride today shape the landscapes we’ll explore tomorrow. This guide has underscored the importance of responsible riding practices and shed light on the eco-friendly initiatives in the industry, encouraging riders to become stewards of the off-road environment.
As we gaze into the future, the roar of 50cc dirt bikes promises thrilling rides, technological marvels, and sustainable innovations. The horizon holds exciting developments that will continue redefining the boundaries of off-road experiences.
In conclusion, the 50cc dirt bike is not just a vehicle; it’s a conduit to an adventurous lifestyle, a community, and a future of endless possibilities. Whether you’re on the cusp of your first off-road journey or a seasoned rider seeking a new challenge, the 50cc dirt bike beckons, ready to etch new tales in the dusty trails of off-road exploration. Embrace the thrill, respect the ride, and let the journey unfold with every throttle twist.
Enhance Your XR650L Adventure: A Comprehensive Guide to Accessories
The XR650L is a legendary dual-sport motorcycle renowned for its ruggedness and versatility. Equipping it with the right accessories is crucial to unlocking its potential and tailoring it to your riding style. Whether you’re gearing up for long-distance adventure touring or conquering challenging off-road trails, many accessories are available to enhance your XR650L experience. This comprehensive guide delves into various categories of accessories, exploring performance upgrades, protective gear, comfort enhancements, lighting solutions, adventure essentials, maintenance tools, and customization options.
Performance Accessories:
| Accessory | Description |
| Exhaust Systems | Upgrading your XR650L’s exhaust system can improve performance, |
| reduce weight, and enhance sound. Options range from slip-on mufflers | |
| to full exhaust systems with optimized airflow and power delivery. | |
| Air Filters | High-performance air filters increase airflow, resulting in improved |
| engine efficiency and throttle response. They are essential for | |
| riding in dusty or off-road environments. | |
| Carburetor Upgrades | Fine-tuning the carburetor can optimize fuel delivery and throttle |
| response, enhancing the bike’s overall performance and efficiency. | |
| Suspension Components | Upgrading suspension components such as springs, shocks, and |
| dampers can provide better handling, control, and comfort over a | |
| variety of terrain, from rough trails to paved roads. |
Exhaust Systems:
Investing in a high-quality exhaust system adds a deep, throaty sound to your XR650L and boosts performance. Aftermarket exhaust systems are designed to improve exhaust flow, increasing horsepower and torque. Some popular options include FMF Powercore 4, Yoshimura RS-2, and Pro Circuit T-4. These systems are available in stainless steel or titanium construction, offering durability and corrosion resistance.
Air Filters:
The XR650L’s stock air filter may not provide adequate filtration in dusty or dirty riding conditions. Upgrading to a foam or cotton air filter, such as those offered by Uni Filter and Twin Air, ensures superior filtration while maintaining optimal airflow. These filters are washable and reusable, making them cost-effective in the long run.
Carburetor Upgrades:
Fine-tuning the carburetor settings can significantly improve throttle response and fuel efficiency. Installing a jet kit or adjustable needle allows riders to tailor fuel delivery to their specific riding conditions and modifications. Popular choices include Dynojet and JD Jetting kits, with comprehensive instructions for easy installation and tuning.
Suspension Components:
The XR650L’s suspension can be further optimized for off-road performance or long-distance touring. Upgrading to progressive springs, adjustable shocks, or aftermarket damping systems enhances ride comfort and stability. Brands like Race Tech, Ohlins, and Progressive Suspension offer suspension components tailored to the XR650L’s weight and riding characteristics.
Protective Accessories:
| Accessory | Description |
| Skid Plates | Protect the engine and frame from rocks, debris, and impacts. |
| Handguards | Shield your hands from branches, rocks, and other hazards. |
| Frame Guards | Prevent scratches and dents on the frame from trail debris. |
| Radiator Guards | Shield the radiator from damage caused by flying debris. |
Skid Plates:
Off-road adventures often involve navigating rocky terrain and challenging obstacles, putting your XR650L’s underside at risk of damage. A sturdy skid plate of aluminum or composite materials protects the engine, frame, and exhaust system. Options like Ricochet and Moose Racing skid plates offer full coverage and easy installation, ensuring peace of mind on rugged trails.
Handguards:
Handguards protect your hands and controls from impacts, branches, and flying debris. They also shield your hands from wind and weather, enhancing comfort during long rides. Popular handguard brands like Acerbis, Barkbusters, and Cycra offer a variety of designs and materials to suit different riding styles and preferences.
Frame Guards:
Trail riding exposes your XR650L’s frame to scratches, dents, and abrasions from rocks and branches. Frame guards, typically made of durable plastic or carbon fiber, provide an extra layer of protection while adding a custom touch to your bike’s appearance. Brands like Works Connection and Polisport offer frame guard kits for the XR650L’s frame geometry.
Radiator Guards:
The radiator is a critical component of your XR650L’s cooling system, vulnerable to damage from flying rocks and debris. Installing a radiator guard helps prevent punctures and dents, ensuring proper cooling performance on hot days or during low-speed maneuvers. Devol and Enduro Engineering radiator guards offer lightweight protection without compromising airflow or cooling efficiency.
Comfort and Convenience Accessories:
| Accessory | Description |
| Seat Upgrades | Enhance comfort and support for long-distance rides. |
| Handlebar Risers | Adjust handlebar height and position for improved ergonomics. |
| Windshields | Reduce wind fatigue and improve aerodynamics on the highway. |
| Luggage Racks and Bags | Increase carrying capacity for gear and supplies on extended trips. |
Seat Upgrades:
Long hours in the saddle can affect your comfort, especially during extended adventure rides. Upgrading to a more supportive and ergonomic seat can alleviate pressure points and reduce fatigue. Gel inserts, foam padding, and contoured designs enhance comfort while maintaining durability and weather resistance. Brands like Seat Concepts and Sargent Cycle offer replacement seats tailored to the XR650L’s dimensions and riding style.
Handlebar Risers:
Adjusting handlebar height and position can improve rider comfort and control, especially for taller or larger riders. Handlebar risers raise the handlebars to a more natural and ergonomic position, reducing wrists, shoulders, and back strain. Options like Rox Speed FX and Tusk handlebar risers come in various heights and configurations to accommodate different riding preferences and body types.
Windshields:
Highway cruising can be tiring due to wind buffeting and noise, particularly at higher speeds. Installing a windshield or wind deflector helps deflect wind over the rider, reducing fatigue and improving aerodynamics. Adjustable and tinted options allow riders to customize airflow and visibility for optimal comfort and safety. Brands like Puig and Givi offer windshield kits designed to fit the XR650L’s fairing and mounting points.
Luggage Racks and Bags:
Extended adventure rides require ample storage space for camping gear, tools, and supplies. Luggage racks and bags provide secure mounting points for saddlebags, panniers, and top cases, allowing riders to carry essentials without sacrificing handling or maneuverability. Rack options from Pro Moto Billet and Happy Trails offer durable construction and easy installation, while waterproof bags from Wolfman and Giant Loop ensure gear stays dry and secure in all weather conditions.
Lighting and Visibility Accessories:
| Accessory | Description |
| LED Headlights | Enhance visibility and reduce power draw. |
| Auxiliary Lights | Increase illumination for night riding and off-road trails. |
| Turn Signals | Improve visibility and compliance with road regulations. |
| Mirrors | Enhance rearward visibility and safety on the road. |
LED Headlights:
Upgrading to LED headlights improves visibility and safety, especially during night rides or low-light conditions. LED technology offers brighter, whiter light output than halogen bulbs, enhancing visibility without straining the bike’s electrical system. Drop-in LED headlight kits from brands like Baja Designs and Trail Tech offer plug-and-play installation and long-lasting reliability, making them ideal for adventurous night riders.
Auxiliary Lights:
For off-road enthusiasts and adventure tourers, auxiliary lights are essential for illuminating dark trails and remote campsites. LED light bars, spotlights, and floodlights provide additional illumination without overloading the bike’s electrical system. Versatile mounting options and adjustable beam patterns allow riders to customize lighting for different riding conditions and terrain. Brands like Rigid Industries and Vision X offer various auxiliary light options tailored to off-road motorcycles like the XR650L.
Turn Signals:
Maintaining visibility and compliance with road regulations is crucial for safe riding, especially in urban areas and high-traffic environments. Upgrading to LED turn signals improves visibility to other motorists while reducing power draw and heat generation. Plug-and-play LED turn signal kits from brands like DRC and TST Industries offer easier installation and enhanced durability than stock incandescent bulbs.
Mirrors:
Clear visibility of surrounding traffic and obstacles is essential for safe riding on the road and trail. Upgrading to larger, more adjustable mirrors improves rearward visibility and situational awareness, reducing blind spots and enhancing safety. Folding and vibration-damping features help prevent damage and ensure visibility remains clear in rough terrain. Options from Double Take and RAM Mounts offer durable construction and universal compatibility with the XR650L’s handlebars and mounting points.
Adventure and Off-Road Accessories:
| Accessory | Description |
| Fuel Tanks | Increase fuel capacity for extended range and off-road adventures. |
| GPS Navigation Systems | Navigate unfamiliar terrain with precision and reliability. |
| Crash Bars | Protect vital components from damage during tip-overs and falls. |
| Saddlebags and Panniers | Carry gear and supplies for multi-day adventures and camping trips. |
Fuel Tanks:
Extended off-road adventures and remote exploration require adequate fuel reserves for peace of mind. Auxiliary fuel tanks, also known as desert tanks, increase the XR650L’s range by several gallons, allowing riders to tackle long-distance routes and remote trails without worrying about fuel stops. Options from companies like IMS and Acerbis offer seamless integration with the XR650L’s frame and fuel system, providing extended range without sacrificing handling or aesthetics.
GPS Navigation Systems:
Navigating unfamiliar terrain and remote trails requires reliable navigation tools to stay on course and avoid getting lost. GPS navigation systems for motorcycles offer precise mapping, real-time tracking, and weatherproof construction, ensuring reliable performance in all conditions. Mounting options and accessories from brands like Garmin and Trail Tech allow riders to customize their navigation setup for optimal visibility and convenience, whether exploring backcountry trails or touring cross-country.
Crash Bars:
Off-road riding inevitably involves spills and tip-overs, putting vital components like the engine, radiator, and fuel tank at risk of damage. Crash bars, also known as engine guards or crash cages, provide essential protection by absorbing impact forces and preventing direct contact with the ground. Robust construction and secure mounting hardware ensure crash bars withstand impacts and provide reliable protection in challenging terrain. Options from companies like SW-Motech and AltRider offer comprehensive coverage and easy installation, safeguarding your XR650L against damage on the trail and highway alike.
Saddlebags and Panniers:
Multi-day adventures and long-distance touring require ample storage space for gear, supplies, and camping equipment. Saddlebags and panniers offer secure and waterproof storage solutions, allowing riders to carry essentials without compromising handling or maneuverability. Mounting systems and quick-release mechanisms from brands like Giant Loop and Wolfman ensure easy installation and accessibility on the trail or at camp. With various sizes and configurations available, riders can tailor their luggage setup to suit their storage needs and riding style.
Maintenance and Repair Accessories:
| Accessory | Description |
| Tool Kits | Carry essential tools for roadside repairs and maintenance. |
| Tire Repair Kits | Patch punctures and replace tubes for continued riding. |
| Chain Maintenance Tools | Lubricate, adjust, and replace chain components for optimal |
| performance and longevity. | |
| Oil and Filter Kits | Perform regular oil changes to maintain engine health and |
| longevity. |
Tool Kits:
Preparedness is vital when embarking on long-distance rides or off-road adventures. A compact and comprehensive tool kit ensures you have the necessary tools for essential repairs and maintenance. Kits like the CruzTOOLS Outback’r and Motion Pro Trail Tool offer a selection of wrenches, sockets, and drivers in a durable and organized carrying case, allowing you to tackle common issues and keep your XR650L running smoothly.
Tire Repair Kits:
Punctures and flats are inevitable when riding off-road or exploring remote trails. Carrying a tire repair kit lets you patch punctures and replace tubes quickly and efficiently, minimizing downtime and getting you back on the trail. Kits like the Stop & Go Pocket Tire Plugger and Slime Power Spair include everything you need to repair tubeless tires, including plugs, patches, and CO2 cartridges for inflation.
Chain Maintenance Tools:
Proper chain maintenance ensures smooth power delivery and extends chain life. Regular cleaning, lubrication, and adjustment help prevent premature wear and tear, reducing the risk of chain failure and drivetrain damage. Chain maintenance tools like chain brushes, lubricants, and tensioners make it easy to keep your XR650L’s chain in optimal condition, even in dusty or muddy riding conditions.
Oil and Filter Kits:
Regular oil changes are essential for maintaining engine health and longevity, especially during extended adventure rides or off-road excursions. Oil and filter kits designed for the XR650L ensure compatibility and optimal performance, providing the necessary lubrication and filtration to protect critical engine components. Options from Honda Genuine Parts and Maxima Racing Oils offer quality oils and filters tailored to the XR650L’s engine specifications, ensuring reliable performance and longevity mile after mile.
Aesthetics and Customization Accessories:
| Accessory | Description |
| Graphics and Decals | Customize the appearance of your XR650L with vibrant graphics. |
| Custom Paint Jobs | Personalize your bike with unique paint schemes and colors. |
| Billet Aluminum Parts | Replace stock components with lightweight and durable billet |
| aluminum parts for added style and performance. | |
| Aftermarket Seats | Enhance comfort and aesthetics with custom-designed seat covers. |
Graphics and Decals:
Adding custom graphics and decals is an excellent way to personalize your XR650L and make it stand out. Whether you prefer bold designs or subtle accents, vinyl graphics and decals offer endless possibilities for customization. Kits from companies like Factory Effex and Throttle Jockey feature high-quality materials and adhesive backing for easy application and long-lasting durability, allowing you to express your unique style on and off the trail.
Custom Paint Jobs:
For riders seeking a truly one-of-a-kind look, a custom paint job can transform your XR650L into a rolling work of art. Professional painters and custom shops offer endless options for colors, finishes, and designs, allowing you to create a bike that reflects your personality and tastes. Whether you prefer classic retro styling or modern urban aesthetics, a custom paint job adds a touch of individuality and flair to your XR650L, turning heads wherever you ride.
Billet Aluminum Parts:
Replacing stock components with billet aluminum parts enhances style and performance, reducing weight and adding visual appeal to your XR650L. Options like brake levers, footpegs, and engine covers are available in various anodized finishes and machined designs, allowing you to customize your bike’s appearance and functionality. Brands like Pro Taper and Warp 9 offer a wide range of billet aluminum parts tailored to the XR650L’s specifications, ensuring precise fitment and long-lasting durability on and off the trail.
Aftermarket Seats:
While the XR650L’s stock seat provides adequate comfort for short rides, long hours in the saddle can lead to discomfort and fatigue. Upgrading to an aftermarket seat cover or complete seat assembly enhances comfort and support, allowing you to ride longer and explore further without fatigue. Gel inserts, memory foam padding, and breathable materials offer superior comfort and durability, while custom stitching and embroidery add a personalized touch to your XR650L’s interior. Brands like Seat Concepts and Corbin Motorcycle Seats offer various seat options designed specifically for the XR650L’s dimensions and riding style, ensuring optimal comfort and performance mile after mile.
Conclusion:
Equipping your XR650L with the right accessories enhances its performance and durability and reflects your style and preferences. From performance upgrades and protective gear to comfort enhancements and customization options, the possibilities for personalizing your XR650L are endless. Whether embarking on epic adventures or exploring local trails, investing in quality accessories ensures a more enjoyable and satisfying riding experience. So, gear up, hit the road, and let your XR650L adventure begin!
Wide Calf Motorcycle Boots: The Ultimate Guide for Riders
Finding the perfect pair of motorcycle boots can be daunting, especially for riders with wider calves. However, fear not! Wide calf motorcycle boots are here to save the day, offering both style and functionality for riders of all shapes and sizes. In this comprehensive guide, we’ll explore the world of wide calf motorcycle boots, their characteristics, design features, safety aspects, and much more. Whether you’re a seasoned rider or just starting, this guide will equip you with the knowledge you need to find the perfect pair of boots for your adventures on the road.
Characteristics of Wide-Calf Motorcycle Boots
Regarding wide-calf motorcycle boots, several vital characteristics set them apart from their standard counterparts. Let’s dive into the specifics:
- Calf Measurement:
- Definition: Wide calf motorcycle boots are designed to accommodate riders with more extensive calf measurements, typically exceeding the standard sizing.
- Importance: Proper calf measurement ensures a comfortable fit and prevents restriction during long rides.
| Calf Measurement | Description |
| Standard Sizing | Typically fits calf measurements up to 15 inches. |
| Wide Calf Sizing | Accommodates calf measurements ranging from 16 to 20 inches. |
Wide calf boots offer relief for riders who have struggled to find footwear that fits comfortably around their calves. No more squeezing into narrow shafts or sacrificing style for functionality.
- Material and Construction:
- Leather vs. Synthetic Materials: Wide calf boots are available in various materials, with leather and synthetic options being the most common.
- Durability and Flexibility: Leather boots offer superior durability and flexibility, while synthetic materials may provide more affordable alternatives.
Choosing between leather and synthetic materials ultimately depends on your budget and preference for durability. However, both options offer excellent protection and style on the road.
- Shaft Height:
- Importance: The shaft height of motorcycle boots determines the level of coverage and protection they provide to the lower leg.
- Variations: Wide calf boots have various shaft heights for riding styles and preferences.
| Shaft Height | Description |
| Mid-Calf | Provides moderate coverage and flexibility. |
| Knee-High | Offers maximum protection and coverage for the lower leg. |
Whether you prefer the sleek look of mid-calf boots or the added protection of knee-high styles, comprehensive calf options ensure a comfortable fit without compromising style or safety.
Design Features
The design features of wide-calf motorcycle boots play a crucial role in aesthetics and functionality. Let’s explore some key elements:
- Zipper vs. Lace-Up:
- Advantages and Disadvantages: Zipper closures offer convenience and ease of use, while lace-up styles provide a customizable fit.
- Preference: The choice between zipper and lace-up closures often comes down to personal preference and style.
| Closure Type | Advantages | Disadvantages |
| Zipper | Convenient, quick on/off | Less customizable fit |
| Lace-Up | Customizable fit, secure | Time-consuming to lace up |
Whether you opt for the convenience of zippers or lace-ups’ adjustability, wide calf boots offer options to suit every rider’s needs and preferences.
- Buckles and Straps:
- Functional and Aesthetic Purposes: Buckles and straps add style and provide adjustability for different calf sizes.
- Customization: Riders can adjust the tightness of buckles and straps to achieve the perfect fit and level of comfort.
Buckles and straps aren’t just for looks—they serve a practical purpose by allowing riders to customize the fit of their boots for maximum comfort and support.
- Breathability and Waterproofing:
- Importance: Breathable materials ensure comfort during long rides, while waterproofing keeps feet dry in inclement weather.
- Features: Wide calf boots may feature breathable linings and waterproof membranes to enhance comfort and protection.
Breathable and waterproof wide calf boots balance comfort and functionality, allowing riders to stay dry and comfortable in any weather.
Safety and Protection
Safety should always be a top priority for motorcycle riders, and wide calf boots offer enhanced protection in various ways:
- Reinforced Toe and Heel:
- Protection Against Impact and Abrasion: Reinforced toe and heel areas shield riders from impact and abrasion during accidents or collisions.
- Materials: Boots may feature reinforced toe caps and heel counters made of durable materials such as thermoplastic polyurethane (TPU) or steel.
Reinforced toe and heel areas provide extra protection, giving riders peace of mind as they navigate the open road.
- Ankle Support:
- Importance: Ankle support is essential for stability and preventing injuries during sudden movements or accidents.
- Padding and Reinforcements: Wide calf boots often feature padding and reinforcements around the ankle area to provide additional support and protection.
With ample ankle support, wide calf boots help riders maintain stability and control, even in challenging riding conditions.
- Traction and Grip:
- Outsole Design: The outsole’s design is crucial in providing traction and grip on various surfaces.
- Importance: A grippy outsole ensures stability and control, especially in wet or slippery conditions.
Wide calf boots with high-traction outsoles offer riders the confidence to tackle any terrain easily, knowing they have reliable grip and stability underfoot.
Comfort and Fit
Comfort is critical when it comes to motorcycle boots, and comprehensive calf options prioritize both comfort and fit:
- Cushioning and Padding:
- Importance: Ample cushioning and padding enhance comfort during long rides and reduce fatigue.
- Placement: Boots may feature cushioned insoles, padded collars, and tongues for optimal comfort and support.
With plush cushioning and padding, wide calf boots keep riders comfortable and supported, mile after mile.
- Arch Support:
- Importance: Arch support is essential for preventing foot fatigue and maintaining proper alignment during rides.
- Materials and Design: Boots may incorporate arch support features such as contoured footbeds or removable insoles.
Wide calf boots with excellent arch support provide riders with the comfort and stability they need for extended journeys on the road.
- Sizing and Fit Considerations:
- Finding the Right Size: Wide calf boots come in various sizes and widths to accommodate different foot shapes and calf measurements.
- Adjustability Features: Some boots feature adjustable closures or elastic panels to accommodate wider calves and ensure a snug fit.
Finding the perfect fit is essential for comfort and safety on the road, and wide calf boots offer options to suit every rider’s unique needs.
Styling and Aesthetics
Wide calf motorcycle boots come in a variety of styles and designs to suit every rider’s taste and preference:
- Color Options:
- Popular Choices: Wide calf boots are available in various colors, from classic black to bold and vibrant hues.
- Matching with Riding Gear: Riders can choose boots that complement their riding gear and reflect their style.
Whether you prefer timeless black or a pop of color, wide-calf boots allow riders to express their personality and style on the road.
- Embellishments and Decorations:
- Studs, Straps, and More: Wide calf boots may feature decorative elements such as studs, straps, and buckles for added flair.
- Aesthetic Impact: Embellishments add visual interest and personality to boots, elevating their overall aesthetics.
From edgy studs to sleek straps, wide calf boots offer a variety of embellishments to suit every rider’s unique style and taste.
Maintenance and Care
Proper maintenance and care are essential for prolonging the life of wide-calf motorcycle boots:
- Cleaning and Conditioning:
- Proper Techniques: Regular cleaning and conditioning help maintain the appearance and integrity of boots.
- Materials: Use appropriate cleaning products and conditioners based on the material of your boots (i.e., leather, synthetic).
Following simple cleaning and conditioning routines, riders can keep their wide calf boots looking and performing their best for years.
- Storage Tips:
- Dry and Ventilated Areas: Store boots in a dry, well-ventilated area to prevent mold and mildew growth.
- Avoiding Extreme Conditions: Avoid exposing boots to direct sunlight, extreme temperatures, or moisture.
Proper storage preserves the quality of wide calf boots and ensures they’re ready for your next ride whenever adventure calls.
Popular Brands and Models
Several reputable brands offer wide calf motorcycle boots, each with its unique features and designs:
- Overview of Brands:
- Reputable Manufacturers: Brands such as Harley-Davidson, Alpinestars, and SIDI are known for their quality motorcycle boots.
- Diverse Offerings: These brands offer a range of wide calf boots to suit different riding styles and preferences.
With a wide selection of brands and models, riders can find the perfect pair of wide-calf boots to match their needs and preferences.
- Highlighting Popular Models:
- Key Features: Highlight popular comprehensive calf boot models and their standout features, such as reinforced construction, waterproofing, and advanced safety technology.
- Customer Reviews and Ratings: Consider customer reviews and ratings to gauge each model’s overall satisfaction and performance.
By exploring popular models and customer feedback, riders can make informed decisions and invest in boots that meet their expectations for quality and performance.
Conclusion
Wide calf motorcycle boots offer riders the perfect blend of style, comfort, and protection on the open road. From their durable construction to their customizable fit and stylish designs, wide calf boots are a must-have accessory for any rider seeking comfort and functionality. By considering the characteristics, design features, safety aspects, and maintenance tips outlined in this guide, riders can confidently choose the perfect pair of wide calf boots to accompany them on their adventures. So, gear up, hit the road, and ride in style with wide-calf motorcycle boots!
In conclusion, wide-calf motorcycle boots are necessary and a statement piece for riders looking to combine style and functionality on the road. With the plethora of available options, finding the perfect pair requires careful consideration of factors such as calf measurement, material, design features, safety aspects, and maintenance requirements. By arming yourself with the knowledge in this guide, you can confidently navigate the world of wide calf boots and embark on your riding adventures with comfort, style, and peace of mind.
- Single Track Dirt Bike Trails: Skills You Need First
- Dirt Bike and ATV Trails Near Me: Sharing the Track With Four Wheels
- Dirt Bike Rental and Trails Near Me: Try Before You Buy in 2026
- Public Dirt Bike Trails Near Me: Check Passes and Rules
- Dirt Bike Trails Near Me: Finding Legal Riding Spots in 2026
- Dirt Bike Riding Trails Near Me: Find Open Ground in 2026
- Choosing the Right Chest Protector for Dirt Biking: A Comprehensive Guide
- Unleashing the Thrill: A Comprehensive Guide to 50cc Dirt Bikes
- Enhance Your XR650L Adventure: A Comprehensive Guide to Accessories
- Wide Calf Motorcycle Boots: The Ultimate Guide for Riders
- Dirt Bikes Unleashed: Navigating the Off-Road Odyssey
- Mastering the Dirt: A Comprehensive Guide to Motocross School Success
- Enhancing Your Ride: Exploring KLX 110-Foot Pegs
- The Kawasaki KLX110R: Unleashing the Dirt Bike Thrill
- A Comprehensive Guide on How to Make Your Dirt Bike Faster